The Atrium
New players coming to Flowergame don't have their own Atrium. Their task is to get familiar with the game first (i.e. raise a few plants from seeds to adult flowers). As soon as you have raised 3 plants in your own garden (those gifted to you by other players don't count), you get access to your Atrium.
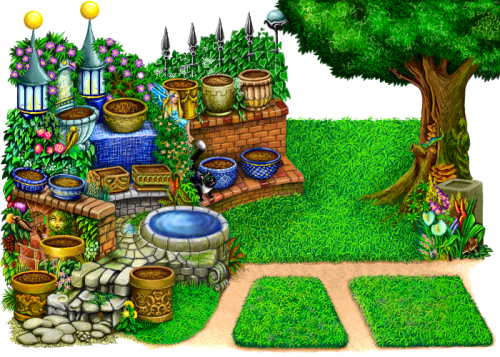
From then on, you can get to your Atrium from "My Garden" page by clicking the Atrium image. Like in the ancient Roman atria, you can now experience a beautful, lush environment that pleases the eye and invites you to have some rest. The decorative plant containers are empty. Below the Atrium, you can see your collection of mature plants. You can use your creativity and imagination to develop and decorate this environment according to your own taste.
Placing plants in containers
If you click a plant from your collection shown below the Atrium, it will appear at the top. You will see a text saying what to do next. All the available flower containers and planting spots will be now shown as empty squares. As soon as you select one of them, the plant image above the Atrium disappears, and is replaced by the garden image  , which takes us to the center of our garden (i.e. "My Garden" page). The plant is now placed at the desired location. Alternatively, you can cancel the action by clicking the red "X" symbol on the right. In this case the plant goes back to your Greenhouse and is available again for placing in the Atrium (when re-selected from the collection below).
Plants can also be placed in the Atrium by using the drag & drop function. You can do it by grabbing the desired flower with pressed left mouse button and moving your mouse with the selected plant to the desired location. When you reach the top or bottom of the page, it scrolls up or down automatically. When you reach the desired location, release the left mouse button. The flower is now placed at the desired location. If the field was occupied by another plant, it will return to the collection below your Atrium.
It is also possible to swap the flowers planted in the Atrium by using the drag & drop function (you don't have to remove the old plants first). In order to do it, grab the desired flower with pressed left mouse button and move your mouse with the selected plant to the desired location. If the field is empty, the flower will be planted at the new location as soon as you release the left mouse button. If the desired field is occupied, the old plant will be replaced by the new one. The old plant will now take the place of the flower you just moved.
Removing plants from containers
It is always possible to redecorate the Atrium or create completely new designs. In the collection of mature plants below your Atrium you will find the last symbol: a spade  . The little flower in front of the spade is to tell you that you DON'T dig over the planting spot, thus destroying the flower, but gently remove it back to your collection. When clicked, the spade symbol appears in the action row above, replacing the currently active symbol (the selected plant or garden image). All the flowers planted in the Atrium are now displayed within white squares. Any plant you now select will be removed from its decoration spot and returned to the collection below.
On the other hand, if we click a plant from our collection below the Atrium, it will disappear from the collection and will be shown above, replacing the spade symbol. Further proceedings are described in section Placing plants in containers . Alternatively, you can also cancel the "remove plant" action by clicking the red "X" symbol to the right of action description. In this case, the spade symbol will be again replaced by garden image.
Placing decorations
The field showing available decorations is located below the collection of adult plants. Decorations can be used to enliven the Atrium and create seasonal designs; they can also provide additional planting spots. If you click a decoration, it will appear as a selected item. You will be moved to the top of the page and the item will be shown in the action row. The text beside infroms you that now you can choose where to place your decoration. If any decoration spot is available, it will be visible in the Atrium as an empty field. When you click it, the item disappears from the action row above and is placed in the selected field. The decoration image in the action row is again replaced by the garden image.
Removing decorations
The last symbol in the decoration field is the tool shed image  . The little green arrow shows that you can move items into the shed. If you click the image, it will appear as a selected item. You will be moved to the top of the page and the shed image will be shown in the action row. You will see a text saying that now you can select the item you want to remove. If the field contains any flowers, they must be removed first. Now if you click a decoration item, it will disappear from the Atrium and return to the decoration field below the flower collection. The tool shed image will stay in the action row until you click a plant, a decoration, the spade image or the red "X" symbol to the right. Then the tool shed disappears from the action row and returns to the decoration field below the plant collection. It is no longer shown as a selected item.
This wiki contains graphics/pictures by flowergame.net.


